Here are the first 2 about getting fabrics into EQ7: EQ7 - First part of video on getting fabrics , EQ7 - Second part on getting Fabrics into EQ

I sew, quilt, do machine embroidery and love crafting! For quilting, I love to use Electric Quilt (EQ8) to design and share.
Sunday, 3 April 2016
EQ7 videos - How to Get More Fabrics!
OK - I'm experimenting with video (without a video camera! I took a couple of videos with my regular camera to try to illustrate this article - What do you think?
Here are the first 2 about getting fabrics into EQ7: EQ7 - First part of video on getting fabrics , EQ7 - Second part on getting Fabrics into EQ
Here are the first 2 about getting fabrics into EQ7: EQ7 - First part of video on getting fabrics , EQ7 - Second part on getting Fabrics into EQ

Sunday, 21 February 2016
Design a Mystery Quilt with Electric Quilt - Part 2
Do you like the patterns you see
in magazines and shows, but want to change the size or colours? Would you like to sew a copyright-free quilt?
Every quilt block and quilt you make can be as unique! Electric Quilt is the easiest quilt design
computer program on the market and it can produce the most complex design you
can draw as you develop your skills!
Mystery Electric Quilt©
We
began this short series of articles in the Summer 2014 issue of The Canadian
Quilter by showing you the ways of choosing fabrics and colours for an Electric
Quilt project. We hope that you have
chosen the fabrics for this project and are ready to work on your layout.
Your homework: By the end of this article, you will have a
project started and will have all your fabrics ready to work with.
At
any time during your reading, you can choose to switch to ‘video’ mode and
watch the excellent videos created by the Electric Quilt staff. They are clearly spoken and accompanied by
screen shots from the program - http://doyoueq.com/lessons_categories/eq7-video/
Start your Project

When
you start Electric Quilt, you first see the ‘tip of the day’ box. You can
read a lot of tips by clicking on the ‘Next’
button, or click ‘Close’ to get to
the next screen. (Figure 1)
 The next screen
offers you 3 choices: Create a new project, Open an existing
project, or Start with a quick-quilt
project. It’s helpful if you think
of ‘projects’ as file folders – inside each file folder you can place many
quilt and block designs. BUT... you have
to remember where your quilts are stored!
Many EQ users employ useful names for their folders, i.e. baby2014, DearJane,
Wedding2014, BOM2014, Guild2014_15, LogCabin, NewYorkBeauty, etc.... This helps you track down and work on your
quilts. As you work on quilt designs
there is a great visual method to keep track of your quilts as well that we’ll
show you later.
The next screen
offers you 3 choices: Create a new project, Open an existing
project, or Start with a quick-quilt
project. It’s helpful if you think
of ‘projects’ as file folders – inside each file folder you can place many
quilt and block designs. BUT... you have
to remember where your quilts are stored!
Many EQ users employ useful names for their folders, i.e. baby2014, DearJane,
Wedding2014, BOM2014, Guild2014_15, LogCabin, NewYorkBeauty, etc.... This helps you track down and work on your
quilts. As you work on quilt designs
there is a great visual method to keep track of your quilts as well that we’ll
show you later.
We
have named this project CQA_Mystery
and we’ll use this name in the series.
Click OK once you have named
your project. (Figure 2) (By the way, I purchased the EQStitch 'add-on' because I own an embroidery machine. But it works exactly the way that EQ7 works with a couple of extra tools for embroidery designs.
Project Menu
Once
you have begun a project, you will see the basic menu and a block design area
(EQ will automatically begin with the last block size you worked with). VERY IMPORTANT NOTE: EQ is not like the word processor you
use. EQ has really made an effort to
help users by making image icons to use in designing. You don’t have to go to File -> SaveAs to
save your project (and, indeed, this will confuse the issue if you do). Your main tools for saving and looking up in
a project will be the red arrow and
the glasses icons on the top
menu. The red arrow icon saves whatever
you are working on (block, quilt, photo or embroidery) and the glasses icon
opens up the Project Sketchbook so that you can look at what you have in the
project. Train yourself to use these on a project to make EQ easier to use. (Figure 3)

Other Icons
The
first two icons on the top bar are 1) the
blue/white page - Start a new project and 2) the file folder - Open an existing project. You don’t use either of these while you are
working on a project.
The
disk icon saves your project. The printer
icon will bring up a menu of various printing options. The curved
arrow icon is a great help – it allows you to ‘back up’ step by step. To the right of the ‘very important’ icons
are the magnifying glasses. The only one that has 2 steps in it is the
‘+’ glass – when you click on it, you must then move to the area of the screen
that you want to zoom in on and, holding down on the left mouse button, draw a
rectangle. When you release the button,
you will be ‘zoomed in’. Next is the ‘video’ icon which will bring up a list
of videos if you choose to pause and watch a technique. The next icon (?) is an excellent tool to use until you are accustomed to EQ. This tool displays dynamic help. If you click it then move to another menu
item, a screen on the right will explain its use.
The last
4 icons are also very important – they indicate what design ‘mode’ you are in –
for example, in Figure 3 you can see that the orange one has been pressed – that means we are in the
‘block design mode’ and the menu item ‘Block’ appears in the Text menu above
the icons. The red icon is the ‘quilt design mode’ and instead
of ‘Block’, the word ‘Quilt’ will appear.
The blue icon is
for working with Photos and EQ is amazing with all the photo features it
has. The green one allows you to add embroidery designs to your
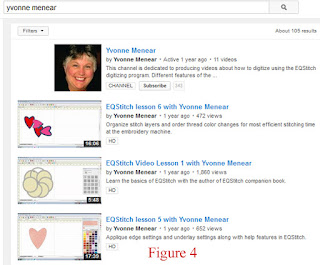
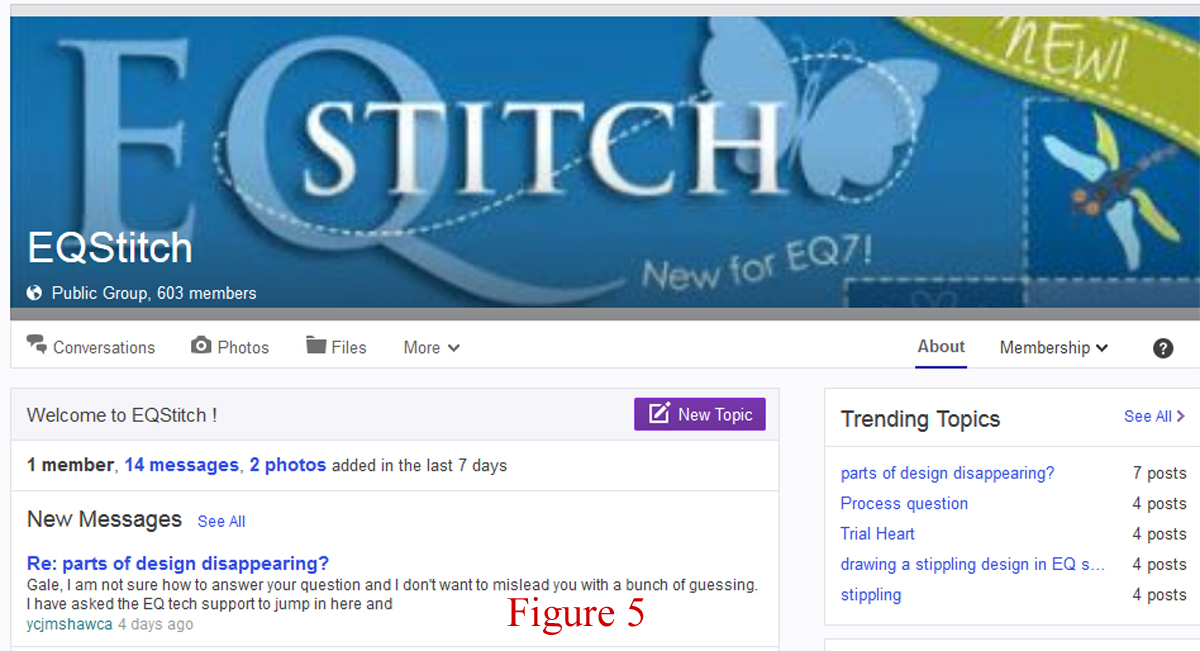
quilts. A Canadian quilter and
embroiderer, Yvonne Menear, has written the instruction book ‘EQ with Me: Learning EQStitch’ and has
produced videos on YouTube (Figure 4), AND she runs a Yahoo group devoted to
helping members incorporate embroidery patterns into their quilts (Figure 5)!


Getting to Work on our Project
The first task
is to import the fabrics chosen in the first article into our project (actually
this can be done anytime during a project as well – there is always the default
library of fabrics you can work with).
On the text menu, you will see the item ‘Libraries’. Click on that,
then roll down the menu and click on the second item – Fabric Library. If you chose
to import .fab fabric files (from the Summer 2014 article) then you will find
them below the EQ7 Libraries. Click on
the library holding the images of fabrics you want to use and then click on the
fabric and click on ‘Add to Sketchbook’
to add a fabric to the project. You can
also hold down the ‘shift’ key and choose several fabrics. (Figure 6)

If you chose to
scan or save fabrics into your personal library, then you should click on My Library and then click on the style
where your fabric images are stored. (Figure 7) You still need to click on a
fabric and then on the button ‘Add to
Sketchbook’ to add the fabrics to your project. We should note that each project can hold its
own unique group of fabrics. Your
‘Baby2014’ project fabric sketchbook may look much different from your ‘DearJane’
project!

Once you have
added as many fabrics as you want to your Sketchbook, you can take a look at
your choices by clicking on the ‘glasses’
icon. This click will open the Project
Sketchbook and when you click on ‘Fabrics’, you will see the default set of
fabrics as well as the ones you have chosen.
We
can note at this point that you have the option of viewing 4 fabrics at a time
or many. The small icons just above the
words ‘Figure 8’ are clickable and will change your view for you. (Figure 8)
Close this menu to move to the next step.

Next Issue: We’ll work on the layout and borders. Did this article answer any of your questions
about Electric Quilt©? I hope so. This software has added a new dimension to my quilt life and I LOVE it!!
Sunday, 17 January 2016
Beginning Electric Quilt 7 (EQ7) - Part 1 of 5 parts
I wrote this set of articles for The Canadian Quilter - the magazine for CQA/ACC http://www.canadianquilter.com
OK - I'm experimenting with video (without a video camera! I took a couple of videos with my regular camera to try to illustrate this article - What do you think? Here are the first 2 about getting fabrics into EQ7: EQ7 - First part of video on getting fabrics , EQ7 - Second part on getting Fabrics into EQ
OK - I'm experimenting with video (without a video camera! I took a couple of videos with my regular camera to try to illustrate this article - What do you think? Here are the first 2 about getting fabrics into EQ7: EQ7 - First part of video on getting fabrics , EQ7 - Second part on getting Fabrics into EQ
I wanted to write some 'beginner' tutorials that would be interesting to follow. Now, almost 2 years later, I'm not sure I should have started with choosing the fabrics for the mystery project, but 'done is done'. If you don't want to do this part, I hope you'll check back soon and try Part 2!
Design a Mystery Quilt with Electric Quilt – Part 1
Electric
Quilt? http://electricquilt.com Why would you
want to design your own quilt on a computer?
There are as many answers as there are people who have learned to use
this versatile computer software:
·
“I used it this
month to design a charity quilt for my quilt club that won’t infringe on
anyone’s copyright.”
·
“I copy the
‘block of the month’ from the guild newsletter when they have a foundation
piecing block and then print out the pattern on interfacing.”
·
“I look up quilt
blocks from the Library in Electric Quilt when I’m thinking about a new quilt
project.”
·
“I created a
queen-size quilt out of ‘tumbling’ or ‘baby’ blocks in 2 different sizes. Now I’m going to colour them in and decide
which size to use to make an English paper-pieced quilt”
·
“I design a
simple quilt and colour it with the fabric samples I get from the
Internet. I like to pick my colours
first, then go shopping!”
·
“I use the
program to make a quilt design and add borders to make the exact size I want”
·
“I always used
to design my quilts on paper, but it’s so much easier to ‘erase’ something in
Electric Quilt!”
·
“I know it’s not
quilts, but I used it to redesign my sewing room!”
·
“I like to participate
in Club EQ (http://doyoueq.com/clubeq/) challenges; first to learn new skills and secondly
to see the wide variety of patterns that are produced and shared.”
Mystery electric quilt
In
this series, we are going to lead you through the design of a mystery quilt
project. The images you will see will be
from Electric Quilt, version 7 (and although Electric Quilt is now available
for Macintosh users, these images are from a Windows computer). We’ll start the project by finding and
selecting fabrics because this is one of the most frequent questions I answer
from new users: “Can I use my own fabrics in my design?” I find that there are generally three groups
of quilt designers: one group wants to
use their own choice of fabrics, the second is happy to choose similar colours,
and the third group believes in ‘value’ and they work with shades of grey. Please choose your own method and then we’ll
continue with the mystery design!
Your homework: The fabric colours you need to choose
are: a dark and light green, a dark and
light flower colour, a background colour and perhaps one to three other colours
for the border.
Using
Your Own Fabrics (jpeg/jpg image files or fab (fabric) files)
A. JPEG or JPG Image files (this format is the same that you use for digital photographs. You use photos of the fabric and import them into Electric Quilt and use them to colour your blocks)
1. If you have your own fabrics at home, you may scan them in with a printer/scanner to scan them in at 72dpi and Electric Quilt has a great ‘Help’ sheet outlining this process.


2.
Even if you do
have the fabrics, it is sometimes easier to use an online shop or fabric
website, like http://www.sew-sisters.com or http://courtepointeclaire.ca/fra/accueil.htm or http://www.myfabricspot.com to find the
fabric swatches of your own stash. When
you see a fabric swatch you want to use in Electric Quilt, click on the image
to bring up the menu (Right click on the mouse or touchpad) MENU . Click on Save Image As... At this point, you need to set up a process that you will
ALWAYS follow – otherwise your fabrics will get ‘lost’ in your computer. Here’s mine:
a.
Click
on ‘Save Image as... – this will open up a file folder so that I can choose
where to save the image
b.
I
open up ‘Documents’, then ‘My Documents’, then ‘My EQ7’, then I have a folder
named ‘fabrics’
c.
Inside
this folder, I create a folder for each website that I use (or you can create a
folder for each quilt project)
d.
I
open up the folder for the chosen website, then ‘Save’ the fabric swatch
e.
Return
to the store menu and repeat the steps to save any other swatches you want
3.
Download
fabrics from a fabric company that provides support for Electric Quilt:
a.
Northcott
(http://www.northcott.net ) is a company providing image files. When you
choose a fabric line from Northcott, you will see a button on the right side of
the window – click on this and you will have the option to open or save the
Winzip file of fabric images. If you
open it, you will be able to select all the fabrics you want, then save them to
a ‘northcott’ folder.

b.
Electric
Quilt has written a help file to aid in downloading fabric samples at: http://support.electricquilt.com/Downloading-and-Importing-a-Manufacturers-Fabrics-into-EQ7.ashx
4.
Once
you have scanned in or saved all the fabrics for your project, the best way to
keep them available all the time in your Electric Quilt program is to ‘put’
them into the ‘My Library’ section
of the ‘Fabric Library’ menu item. By
adding them to the ‘My Library’ section, you will be able to use the fabrics in
any project.
B.
FAB files (fab
files are groups of fabric files – each group will hold a different number of
fabric images. Electric Quilt has a
method of organizing the groups as ‘libraries’ of fabrics. It is useful to follow their method: In the section on your computer: My Documents, create a new folder
called ‘Monthly Libraries’. If you
always save your ‘fab’ files in this folder, you’ll be able to add the files
easily to your quilt projects.
1.
Using the Electric Quilt FAB files: http://doyoueq.com/project_download_categories/fabric-downloads// free fabric
libraries
·
(Do
not choose Open.) Save the file to your My
Documents > Monthly Libraries folder.
·
Link
to the folder full of files:
·
If you
have EQ6 or EQ7, you need to
link the folder.
Do the following steps (you only need to do this once):
Do the following steps (you only need to do this once):
1.
Click
LIBRARIES > Fabric Library > Link Library button.
2.
Click
Add, type in Monthly Libraries and click Browse.
3.
Select
the My Documents > Monthly Libraries folder.
4. Click OK, then
click Close.

2.
Using FAB files
from other sources
·
Connecting
Threads is a company that creates fab
files for Electric Quilt users: http://quiltwithus.connectingthreads.com/page/eq-downloads?intmedid=FreebieHome--EQFabricDownloads
·
Follow
the directions on the site and save the files in the folder – ‘Monthly
Libraries’
Did
this article answer any of your questions about Electric Quilt? Stay tuned for future articles and to take
part in designing our Mystery Quilt! Send your questions to macdonaldlp@gmail.com.
Thursday, 29 October 2015
EQ7 - Quick Design with Jackie's Janome Block
Janome has come out with an idea to publish 100 quilt blocks. This is a great time to get 100 fresh new block designs, plus a chance to play with EQ7 - Electric Quilt - which I think is one of the best quilt designing computer programs available.
One way to practise with EQ7 is to take a block someone has already designed, draw it up in EQ in the block design section and then try it out in a quilt.
So I took one of Jackie White's blocks. You can see the block at Jackie's Facebook page and download the pattern from Janome. The first quilt I designed doubled the size of the blocks to 12" square and uses two borders - the quilt ends up at 82" x 94"
 Fabric needed (EQ7 uses yards, not meters):
white: 1 7/8 yd.
olive green: 2 1/2 yd.
grey: 1 7/8 yd.
red: 1 yd.
brown: 1 5/8 yd. (Note: the red and brown are also used for the borders and binding)
The second quilt is only 73" x 85" with the binding (I always add a 1/2" border to simulate the binding fabric needed) and uses these fabrics:
silver: 3 7/8 yd.
light brown 1 1/2 yd.
red: 1/2 yd.
brown: 1/2 yd

So I took one of Jackie White's blocks. You can see the block at Jackie's Facebook page and download the pattern from Janome. The first quilt I designed doubled the size of the blocks to 12" square and uses two borders - the quilt ends up at 82" x 94"
 Fabric needed (EQ7 uses yards, not meters):
white: 1 7/8 yd.
olive green: 2 1/2 yd.
grey: 1 7/8 yd.
red: 1 yd.
brown: 1 5/8 yd. (Note: the red and brown are also used for the borders and binding)
The second quilt is only 73" x 85" with the binding (I always add a 1/2" border to simulate the binding fabric needed) and uses these fabrics:
silver: 3 7/8 yd.
light brown 1 1/2 yd.
red: 1/2 yd.
brown: 1/2 yd

Wednesday, 28 October 2015
Quilt Retreatables
OK, this might be a longish story, so feel free to just look at the photo and leave!! A couple of years ago, the Canadian Quilters Association/Association de la courtepointe canadienne had a Trend-Tex challenge with 5 fat quarters that you could make into a wall hanging or a 'wearable'. It was interesting to see how many different things could be made from the same 5 fat quarters! (My project was handed in late so it doesn't show up in the gallery.)
I decided to make 'Quilt Retreatables'  The hat was a reversible sun hat pattern from April Cobb - I made the large size, but could use one a little bit larger. Really easy to make though. I made the sample one with Riley Blake fabric (this fabric has its own story! My friend, Jackie White had emailed me that Riley Blake had a challenge out to use some of their fabric to make a bag and send in photos. I was in Florida at the time and only found the fabric used in this photo at a place about 45 minutes from where I was staying. I bought the fabric, but never got the tote made - going to Spring training games to watch the Cardinals, visitors, shopping at Bealls, etc...)
My plan for this kit was to make a set of items that I could take to every quilt retreat. I attend an annual one at Red Lodge Resort on beautiful Manitoulin Island (just in case you don't know: the island is in Lake Huron and is the largest island in a fresh water lake). I wanted the tote to hold my 12 1/2" ruler and small cutting mat, so I designed a square one about 13 1/2" wide and deep enough to hold other tools, threads, bobbins, etc. I had to start mine before I could make the kit for the Trend-Tex Challenge, but didn't finish it right away. I sewed enough to check out my pattern, then completed the Trend-Tex quilt retreatables in time to go to the St. Catharines CQA/ACC quilt conference. It raised $50 in the silent auction.
Last winter I finished my own tote and added a camera bag and a tablet bag to my kit and have taken it away to a quilt retreat and my annual sewing vacation at Boyne, Michigan. I love it and may make some coordinating pieces to take with it - let's see, I could probably use a sewing machine cover, needle case, thread catcher, .... so many other necessities at a quilt retreat!! Maybe even some coasters for my wine glass in the evenings on the deck!
The hat was a reversible sun hat pattern from April Cobb - I made the large size, but could use one a little bit larger. Really easy to make though. I made the sample one with Riley Blake fabric (this fabric has its own story! My friend, Jackie White had emailed me that Riley Blake had a challenge out to use some of their fabric to make a bag and send in photos. I was in Florida at the time and only found the fabric used in this photo at a place about 45 minutes from where I was staying. I bought the fabric, but never got the tote made - going to Spring training games to watch the Cardinals, visitors, shopping at Bealls, etc...)
My plan for this kit was to make a set of items that I could take to every quilt retreat. I attend an annual one at Red Lodge Resort on beautiful Manitoulin Island (just in case you don't know: the island is in Lake Huron and is the largest island in a fresh water lake). I wanted the tote to hold my 12 1/2" ruler and small cutting mat, so I designed a square one about 13 1/2" wide and deep enough to hold other tools, threads, bobbins, etc. I had to start mine before I could make the kit for the Trend-Tex Challenge, but didn't finish it right away. I sewed enough to check out my pattern, then completed the Trend-Tex quilt retreatables in time to go to the St. Catharines CQA/ACC quilt conference. It raised $50 in the silent auction.
Last winter I finished my own tote and added a camera bag and a tablet bag to my kit and have taken it away to a quilt retreat and my annual sewing vacation at Boyne, Michigan. I love it and may make some coordinating pieces to take with it - let's see, I could probably use a sewing machine cover, needle case, thread catcher, .... so many other necessities at a quilt retreat!! Maybe even some coasters for my wine glass in the evenings on the deck!

Sunday, 27 September 2015

Sunday, 12 October 2014
Quilt memes 1
I'm going to try to put together some quilt memes for quilters who are teeny bit older!


Subscribe to:
Posts (Atom)