
Life and Electric Quilt went off the list this month, except
for fixing my Fall quilt!
We had a great workshop sponsored by our guild in
October. Although I don’t need more
UFOs, I always enrol in guild workshops for 2 reasons: to support the guild and to learn more – I find
that I learn from the teacher and also from the other participants! This one was a workshop by Marilyn Maki of
Sault Ste. Marie (no link because she doesn’t have a website, but she does
belong to the guild - www.saultquilts.com. Here topic was crazy quilt stockings or
pillow tops. One of my oldest friends had
given me lace, tatting and handkerchiefs from women in his family, so I took
those to use to make a stocking for him as a family remembrance.
Once I got to the workshop, I found that Melissa McIntosh
(our amazing longarmer https://www.facebook.com/see.melissa.quilt/ ) had brought a large bin of fabrics given to us by Connie Wilson before she
died). Then our workshop leader,
Marilyn, had also brought a plethora of ribbons, beads, amazing fabric to share! Yes, to share, not sell! How generous of her! She also brought a friend, Susan Bailey, who
showed the amazing crazy quilt blocks she is making with her family’s
clothing. One block even contains a
piece of the suit her father wore when he married her mother.
With Marilyn’s guidance, I worked on the stocking that has
the navy and pink sections to it. I had
to coffee-dye some of the pink pieces, because I wanted to see a more ‘dusty’
version of the colour. Although I seldom
finish workshop pieces, I went home and finished sewing the stocking and
started right away on the other side.
For the back side I decided to use the handkerchiefs Michael had given
me and I folded them to fit. It wasn’t
until I completed the back that I realized that it had been so long since I had
made a Christmas stocking that I hadn’t checked which side of the foundation to
sew on!!! Well…I had 2 fronts now.
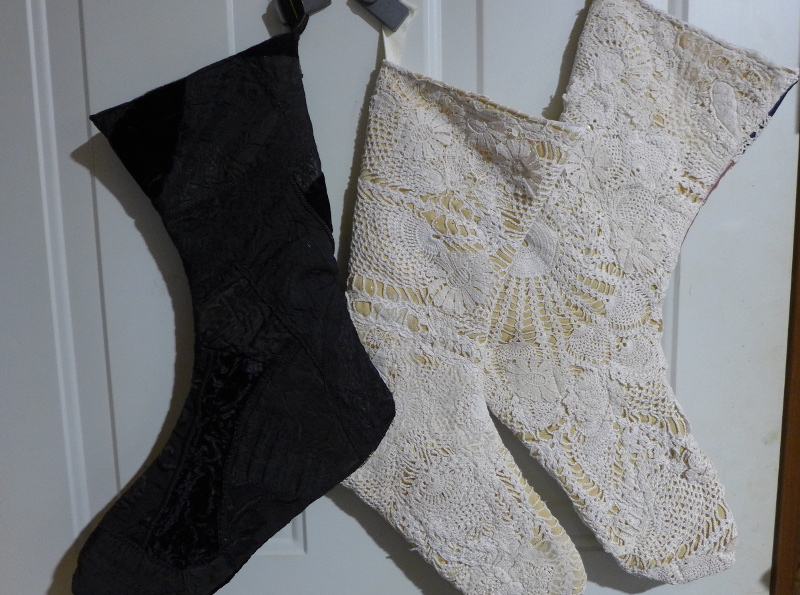 |
| The backs of the stockings |
What to do? Should I just use plain backs? No! I
took a group of plain crocheted doilies and handkerchiefs and layered them on a
large piece of gold fabric. I placed
tissue paper on top and then sewed all over it with invisible thread. After I had secured all the pieces, I tore
off the tissue paper and sew more carefully in some places. I then cut out the backs. For the black one I took apart 2 crazy
quilted vests I didn’t wear anymore. I
used one for the front and one for the back and the lining of the vests for the
lining for the stocking.
Now I have 3 stockings for my friends and enough to make
another one!
 |
| Closer look at quilting |


 Next gifts: I’ve been
wanting to make more zippered pouches, so when I saw this tutorial: https://weallsew.com/two-pocket-pencil-case/
I decided to make 2 for my nieces for Christmas. I had coloured pencils and pens for them,
along with some black leather and zippers.
I embroidered the front with their initials (S and SJ), then sewed them
together. I also had to watch a YouTube video,
because I wasn’t sure from the tutorial how to sew it together, but I think
they look alright – what do you think?
At one of the local Christmas market, I bought a bit of jewelry to use
as zipper pulls. Then this week I
watched Man Sewing with a boxy pouch, so I’m going to make that one now!! https://mansewing.com/2018/06/boxed-zipper-pouch/ I’m not saying I’m over being afraid of
putting in zippers, but I feel a little more comfortable now.
Next gifts: I’ve been
wanting to make more zippered pouches, so when I saw this tutorial: https://weallsew.com/two-pocket-pencil-case/
I decided to make 2 for my nieces for Christmas. I had coloured pencils and pens for them,
along with some black leather and zippers.
I embroidered the front with their initials (S and SJ), then sewed them
together. I also had to watch a YouTube video,
because I wasn’t sure from the tutorial how to sew it together, but I think
they look alright – what do you think?
At one of the local Christmas market, I bought a bit of jewelry to use
as zipper pulls. Then this week I
watched Man Sewing with a boxy pouch, so I’m going to make that one now!! https://mansewing.com/2018/06/boxed-zipper-pouch/ I’m not saying I’m over being afraid of
putting in zippers, but I feel a little more comfortable now.
Oh...and a couple of mugrugs for my grandson's study area - Of course I'll have to explain what a 'mugrug' is. He studied piano for years and I make him a quilt with a piano key design for 2 borders, so I had some sections left over.
 |
| a few more reusable gift tags - vinyl pockets on the backs |


